How to use the Wilton Heart Shaped Centre Cake Pan

It’s all in the pan, which consists of two halves in which you bake the two cake layers. If you layer them correctly, you should end up with a heart shape in the centre. The set comes with an instruction booklet and recipes but I decided to try it out with my own chocolate sponge cake recipe and a whipped cream filling. The whipped cream was not as firm as I would have liked and in future I will try buttercream or mousse to fill the heart.

Chocolate Sponge Cake Recipe
Ingredients:
1 1/2 cups sugar
4 eggs, at room temperature, separated, plus 2 extra egg whites, also at room temperature
1/2 cup sunflower oil
1/2 cup warm water
1 cup flour, sifted
3/4 cup cocoa powder, sifted
1 tsp bicarbonate of soda
1 tsp baking powder
1/4 tsp salt
Ingredients for buttercream filling and icing
150g milk chocolate
125g butter
4 cups of icing sugar
5 Tbsp cocoa powder
1/4 cup milk

Equipment and extras:
Wilton Heart Shaped Centre Cake Pan
Any cake decorations, such as these from Nicoletta
An icing spatula
Instructions:
1. Preheat your oven to 180°C.
2. Grease both of the Wilton pans thoroughly on the inside, using butter. If the cake sticks to the pan the heart shape will not show up.
TIP: Make sure you have the Wilton pans the right way around. The Wilton logo should be facing downwards and read backwards when youʼre looking at them, as in the photo. The rolled rim should face upwards and the flat section of the pans downwards. Place them onto a cookie tray so that they are easy to remove from the oven.

3. Whip the egg whites, 6 in total, with an electric mixer, until stiff peaks form. See here for some tips.
4. Combine the oil, sugar, water and egg yolks in a large bowl. Mix thoroughly.
5. Add the dry ingredients to the sugar mixture and mix until combined.
6. Finally, gently fold the egg whites into this mixture. Do not over-mix, as you donʼt want all the air you whipped into the egg whites to escape. The air in the whipped egg whites helps to make your cake nice and ‘spongy’.
7. Divide the batter more or less equally between the two halves of the Wilton pans.
8. Bake for about 30 minutes or until a cake tester comes out clean. You can use the cake baking time to prepare both your filling and your icing. I used a whipped cream filling but I recommend trying the buttercream for your filling and icing. Here’s an easy buttercream icing recipe.
Buttercream recipe instructions:
– Melt the chocolate in a saucepan over very low heat, being careful not to scorch.
– Cream the butter with an electric mixer and slowly add 2 cups of icing sugar.
– Add the melted chocolate and the milk and mix until combined.
– Add the rest of the icing sugar and the cocoa powder and mix until smooth. You can also add more milk if the icing is too thick but remember that a stiffer filling is better for this cake. Set aside to cool.
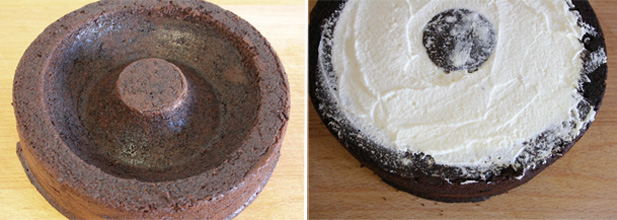
9. When the cakes come out of the oven leave them to cool in the pans for about 30 minutes. Then gently turn the cakes out of the pans. The narrow circles in the middle of each cake need to be together when the cake is sandwiched together, so bear this in mind when you are filling the cavity.
10. Now fill the heart shaped cavity in both cakes with your filling, using a palette knife or offset spatula.

TIP: Make sure you note which cake is the top part of the heart, so you donʼt get them confused.
11. Let the two halves chill in the fridge for about 15 minutes to set the filling, then carefully sandwich the two sides together, being sure that the edges line up with one another. Chill the whole cake for a further 15 minutes, to set the heart shape.

12. Roughly coat your cake in a thin layer of buttercream to seal in the crumbs. Some bakers refer to this step as crumb-coating. You can think of it as a ‘base coat’ of paint. Leave the cake in the fridge for 15 minutes so this layer sets, ensuring the final icing layer is smooth and crumb-free.

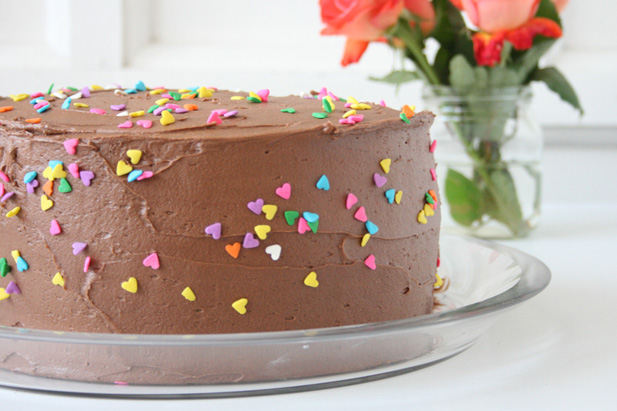
13. Now you can add the final layer of buttercream and decorate however you wish.

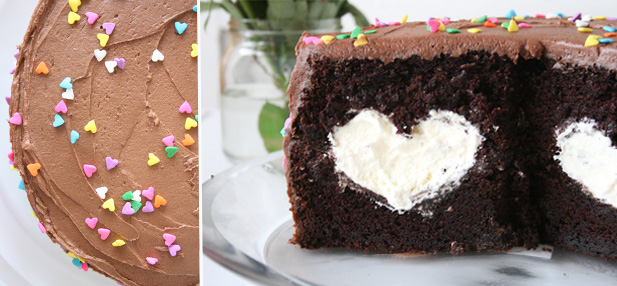
If all went well, your friends will get a wonderful heart shaped surprise when you cut your cake. This cake is great for baby showers, birthdays and all sorts of special occasions. The design is sure to impress and each slice will have some delicious filling along with the cake. The Wilton Heart Shaped Centre Cake is definitely no ordinary cake.

If your cake filling didn’t come out the way you had hoped, don’t be disheartened. This is a tricky one and can take several attempts to perfect but the results, once the method is mastered, will fill your cake-loving heart with pride and joy.
Check out the Wilton Heart Shaped Centre Cake Pan on Yuppiechef.com
One of our awesome foodie friends, Janis Cheadle sent us a pic of her heart shaped cake. Not bad for an infrequent baker. Janis, your cake stole our hearts.

